| Home | Job | Pinball | Photo Album | Automotive | Press/Awards | Contact |

Satellite Servicing Demonstration
The Hubble Servicing Project goes to workon other Satellites
(Page 3)
Page 2 is here.
Arrival
at
the
Kennedy
Space
Center
I travelled to KSC on
March 2 2011,
before the rest of the team to bring the electrical support
equipment. That weekend, I returned home to attend the 2011
Seton
High School Father-Daughter Dance. That was a very memorable
event. The following week, we shipped the RRM flight hardware
to
KSC.

The RRM was shipped on the same truck and by the same driver as WFC3 back
in 2008. It gives the hardware a very soft ride. Our facility there was the
Space Station Processing Facility (SSPF).

This is the small team that went to KSC to receive the hardware and that did
the post-ship checkouts.

Here the electrical team is checking out the tools to make sure there were no issues
during the transportation.

The connections from RRM to Space Station and our test equipment is underneath the platform. I am one of the few that can fit underneath to mate the connectors.

As part of the operations at Kennedy, we hosted the crew of STS-135 to show them
what RRM does and how it works.

STS-135 will have only four crew members. They are (from left to right):
Doug Hurley (pilot), Sandy Magnus (MS-1), Chris Ferguson (CDR), and Rex Walheim (MS-2).
March 2011, NASA releases our fact sheet.
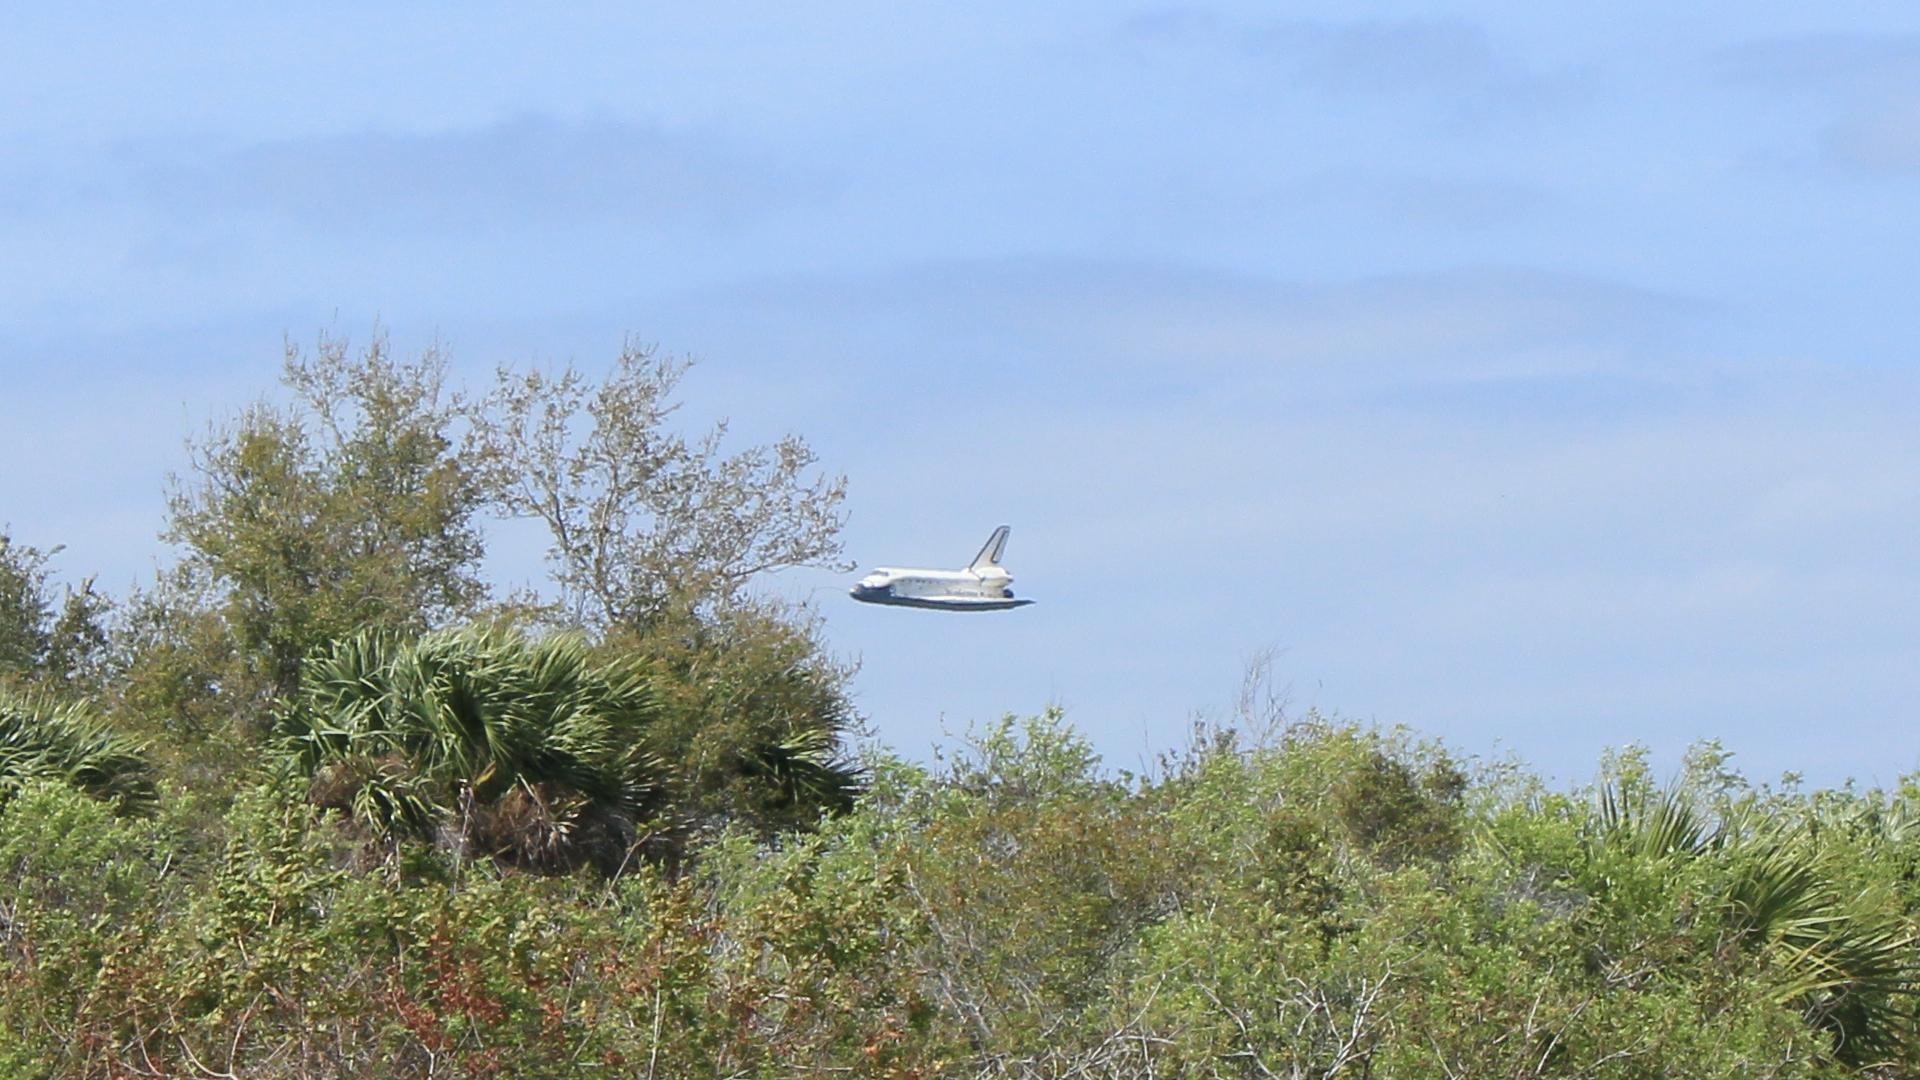
Final landing (from space) of the Space Shuttle Discovery. Photo Tim Wasserman.
Click for larger image.
On March 9 2011, we saw
the final
landing
of Discovery from her last mission in space. WOW, what an
experience. We were waiting near the start of the Shuttle
Landing
Facility. About three minutes before touch down time, we
heard
the famous double sonic BOOM. Up until that time, it was the
usual quiet of the KSC nature preserve. Then BOOM-BOOM, and
Discovery announced herself with fanfare. Once all the sound
of
the Shuttle reached us, the air was filled with a soft roar, and I soon
spotted Discovery way up high at a steep 60 degree elevation from our
location. She banked down steeply and landed swiftly as we
shot
the above picture. It was very memorable.

The final stopping point of Discovery's nose gear was noted with this mark.
I was told that a small plaque will be embedded into the run way at this location. Photo by Bill Ingalls/NASA.
The final stopping point of Discovery's nose gear was noted with this mark.
I was told that a small plaque will be embedded into the run way at this location. Photo by Bill Ingalls/NASA.
Article
on
nasaspaceflight.com
on
the
final
landing.
Photo gallery on Discovery on Boston.com

On March 10, 2011, the Endeavour was rolled out of the VAB
and moved to launch pad 39A for the last time. It was a
cold and windy night, but clear and the sight
was absolutely beautiful. The ship was lit up
like a rock star on stage.

The next morning at sunrise, we visited the pad. The RSS had not
covered the Shuttle yet, and there was not a single cloud in the
sky. It was a beautiful morning for seeing Endeavour on the pad
for the last time. It was a bittersweet feeling for me.

On one of our visits to the pad we saw this 1940 Chevy sedan parked at the
pad. It is a very unique juxtaposition to see this antique car next to the Shuttle.
Photo gallery on Discovery on Boston.com
On March 10, 2011, the Endeavour was rolled out of the VAB
and moved to launch pad 39A for the last time. It was a
cold and windy night, but clear and the sight
was absolutely beautiful. The ship was lit up
like a rock star on stage.
The next morning at sunrise, we visited the pad. The RSS had not
covered the Shuttle yet, and there was not a single cloud in the
sky. It was a beautiful morning for seeing Endeavour on the pad
for the last time. It was a bittersweet feeling for me.
On one of our visits to the pad we saw this 1940 Chevy sedan parked at the
pad. It is a very unique juxtaposition to see this antique car next to the Shuttle.

Back at work, here we test with the simulator of the computer that will be controlling
the RRM in space. This computer is located on the Express Logistics Carrier (ELC). Our tests here with the ELC Simulator verify that we are compatible and will work successfully in space (3/22/11).
Pictures of our transfer to the ELC lab on KSC's site.
Click here and search for "Robotic Refueling Mission".

This Walk/Run event is held on an annual basis on the Shuttle Landing Facility.
While at KSC, we decided
to
participate in the 2011 Kennedy Space
Center Annual Walk/Run on the Shuttle Landing Facility. We
figured that it was a
once-in-a-lifetime opportunity to run or skate on this
landing strip. It was held on March 22, and the weather that
day
was excellent.

Here are most of our team mates that participated. Kelly Scharmann, Ray Witcher,
Mike Oetken, Kelvin Garcia, and me. I decided it was just too nice to pass up on opportunity to skate on the Shuttle Landing Facility.
I knew the SLF landing
way would be
cut with drainage slits, and in the days leading up to the skate was
concerned about this producing a strong vibration on my
inlines.
We
arrived on race day with only 10 minutes to spare due to us still
testing with the ELC simulator. After registering, and eating
a
snack,
we were told to make our way from the gathering area onto the
runway.
It was very exciting walking in that large parade of over 500 people,
all heading to the Start/Finish line.
At this point, I noticed that I had a screw missing on one of my hubs, and I was very disapointed that this may ruin my chances of a good day. I pushed the hub back into the skate frame, and it appeared to stay in and work ok. It would turn out that the missing screw was not of any consequence the rest of the day.
Heading towards the Start line, at some point, the crowd broke into a running pace, and the race was on! We rounded the right turn to get onto the runway. It felt like a NASCAR race, and rounding the corner on Turn 1. It was really an exciting feeling. The edge of the runway is quite smooth, and easy to skate on. However, I could see that everyone was staying on the right edge. I decided to break with the pack, and skated out onto the center of the runway by myself. I was surprised no one followed me onto the main runway. It was exhilerating to be skating solo down the middle and seeing the wheel marks of the landing Shuttle. I was skating where the Shuttle lands!
Our small group consisting of my coworkers from Goddard had chosen to enter the 5 km distance, and this meant we would be going down the runway for 2.5 km, and then turning back to the Start/Finish line.

View from down the center of the runway. Note the skid marks of the landing planes/Shuttle. On the very right, you can see the other runners. I was the only one in the middle of the runway.
I was _flying_ down the run way very fast, and making great
progress. I did not see any of the drainage slits, which
puzzled
me. I decided to make some circles to make the experience
last a
little longer, and when I turned back towards the Start I felt the wind
hit me strongly. That is when I realized I was being pushed
by
the wind, and that is why I was going so very fast. I turned
back
downwind, and skated a long time going backwards down the
runway.
That was fun.
Then, after skating several thousand feet, I encountered the drainage slits, and was it ever bumpy! My skates were buzzing loudly. I decided not to stick with it, and skated back towards the right edge, joining the other runners.
I arrived in very little time at the 2.5km turn around point. I had probably skated about 10 minutes, and it was surprisingly easy due to the tail wind. At the turnaround point, I went to chat with a member of the photo crew, and showed him the picture by Ingalls. The photographer gave me some tips on where the stopping point of STS-133 might be based on his recollections, and I was optimistic that I would find that spot.
I decided to tolerate the vibration of the drainage slits and skated down the bumpy middle of the runway going back to the Finish line. After several thousand feet, I saw a red patch up ahead, and felt pretty good that I would find the target spot.
At this point, I noticed that I had a screw missing on one of my hubs, and I was very disapointed that this may ruin my chances of a good day. I pushed the hub back into the skate frame, and it appeared to stay in and work ok. It would turn out that the missing screw was not of any consequence the rest of the day.
Heading towards the Start line, at some point, the crowd broke into a running pace, and the race was on! We rounded the right turn to get onto the runway. It felt like a NASCAR race, and rounding the corner on Turn 1. It was really an exciting feeling. The edge of the runway is quite smooth, and easy to skate on. However, I could see that everyone was staying on the right edge. I decided to break with the pack, and skated out onto the center of the runway by myself. I was surprised no one followed me onto the main runway. It was exhilerating to be skating solo down the middle and seeing the wheel marks of the landing Shuttle. I was skating where the Shuttle lands!
Our small group consisting of my coworkers from Goddard had chosen to enter the 5 km distance, and this meant we would be going down the runway for 2.5 km, and then turning back to the Start/Finish line.
View from down the center of the runway. Note the skid marks of the landing planes/Shuttle. On the very right, you can see the other runners. I was the only one in the middle of the runway.
Then, after skating several thousand feet, I encountered the drainage slits, and was it ever bumpy! My skates were buzzing loudly. I decided not to stick with it, and skated back towards the right edge, joining the other runners.
I arrived in very little time at the 2.5km turn around point. I had probably skated about 10 minutes, and it was surprisingly easy due to the tail wind. At the turnaround point, I went to chat with a member of the photo crew, and showed him the picture by Ingalls. The photographer gave me some tips on where the stopping point of STS-133 might be based on his recollections, and I was optimistic that I would find that spot.
I decided to tolerate the vibration of the drainage slits and skated down the bumpy middle of the runway going back to the Finish line. After several thousand feet, I saw a red patch up ahead, and felt pretty good that I would find the target spot.

I found the spot where Discovery's wheels stopped on her last mission to space, and
I decided to put my wheels there also as a tribute. Compare to this.
Getting close, I
realized that I had
indeed found the spot where Discovery stopped, marked by the red spray
painted sign. Since I was by myself, I had no one to exchange
picture taking favors, so I decided to put my skates into the picture,
right where Discovery's wheels were. Up ahead, I could see
other
red patches where other missions had ended, but I decided to return to
the Start/Finish line on the smooth edge of the runway. I
skated
in a speed skating position (arms tucked back) to slip past
the wind. It was quite a work out nevertheless, so I got a
good
skate out of it in the end.

At the end of the runway is the Mate-Demate Facility. This is where the Shuttle is removed from the Jumbo 747 that transports it across the country.

Back home at Goddard, at the end of March 2011, we had our first mission simulation for training the team.

Along the back row is the systems and operations leads.

These are the mechanical and robotic tool console positions.

Back at KSC, we next mount RRM onto our cross Cargo Bay carrier called the Lightweight MPESS Carrier (LMC). This is the structure that will carry our hardware into space on the Shuttle. This was shot in the SSPF high bay.

Here is RRM flipped upside down on the carrier via the rotating stand. It was quite a sight seeing our hardware being rolled/flipped upside down.
Click on this movie to see the rotation of RRM to the upside down position.

Our second visit to ISIL to verify our Tool Electronics.
In early April 2011, we
returned to
the Johnson Space Center ISIL
facility to verify the Tool Electronic's compatibility with the SPDM
robot. This repeats the test we first performed last year. In the above
picture, the gold
box on the red ESD mat is the flight spare Tool Electronics Box (TEB)
attached to a video camera (black long tube). This is plugged
into the simulator of the robot arm in the grey box from MDA.
The test was successful, showing we are ready for the on-orbit robot to use the tools for robotic refueling.
The test was successful, showing we are ready for the on-orbit robot to use the tools for robotic refueling.

We took the opportunity to walk around Building 9 where the Full Fuselage Trainer and other trainers for the astronauts are located.
Compare with this image from SM4.
Next Page for this mission