| Home | Job | Pinball | Photo Album | Automotive | Press/Awards | Contact |

Indiana


Background
During
our summer vacation
in Aruba one year, the kids played on an Indiana Jones
machine at a Pizza Hut. They liked it very much, and I
started to consider it as a candidate for my second pinball
machine. After a few months of casual looking, I found one being
sold by a dealer in
The renovation

I
first stripped the playfield of all parts, and cleaned and waxed the
surface.

The upper playfield in its stripped and original condition.
Look how dirty it is.

After renovation of the top part. The lane in the foreground
has had wax applied, but it has not been buffed out.
The above picture shows the upper part of the playfield after reassembly. It took about 9 hours of work to get to this point. Some steps that were done:
- The three and one bank targets were dismounted, disassembled, completely cleaned, new NOS target decals applied, and new coil sleeves installed.
- Posts were thrown in the polishing tumbler for two days.
- Jet (pop) bumpers completely rebuilt. New skirts, buffed pop rings, new bulbs, new coil sleeves, etc.
- New rubber kit installed.
- Bulbs replaced. Bulb sockets were buffed with a wire brush and blown clean. Good bulbs were washed with alcohol.
- All metal guides buffed with 1000 grit sandpaper to a brushed luster finish.
- Playfield surface cleaned with Novus 2 and then waxed twice.
- Underneath of inserts washed with Q-tips soaked in alcohol.
- Round screw heads were polished by chucking them in a cordless drill, and hex ones were replaced with new ones.

Example
of Novus 2 at work (blue circle). Compare to Alcohol (IPA) +
Magic Eraser (red circle),
and water and a sponge (green circle)
I experimented with various methods to remove the caked-on dirt that was on the playfield. I tried water with a sponge, Novus 2, and Alcohol (IPA) with Magic Eraser. As can be seen in the above image, the clear winner was Novus 2. The water hardly made a dent in the dirt, and the IPA did a little better. The Novus 2 was amazing as it dissolved the tough dirt, forming a brown mud that I could wipe off.

The plastics were in great shape except the two slingshot
plastics. Amazingly, I found a
new and unused set inside the cabinet while I was vacuuming it
out. What luck!
After I used Novus 2 on them, they looked like new. They are
normally about $25.

When taking the parts off, I laid them out in the same general way that
they are originally
located. This allowed me to find the parts later.
Note the double amount of sling plastics.

Another view of the cleaned up upper playfield. The "Mode"
plastic in the foreground is commonly broken.

A collection of various souvenirs for this machine bought on
ebay.
This totalled $15, including shipping.
One common problem on these machines is the condition of the idol ruins on the right hand edge of the playfield. They often crack as a result of stress such as from ball strikes. Mine was no exception. I repaired them in a manner similar to the way I repaired the plastic ramps on my Space Shuttle.

Original condition of one of the idol ruins. Missing part
around the mounting hole,
and a crack at the hole for the flashing light.
After repairing the cracks, the shell of the ruins felt much stiffer and stronger. I then mixed up some acrylic paint and touched up the area. The main body color was mixed from orange-brown-white, while the rock accents were brown. After the touchup, the repairs blended in well with the original area.

The repairs were made with epoxy and fiberglass tape. After
painting, the repairs
are difficult to spot.

Idol ruins with flashing light and mounted into the machine.
Almost like new.

Assembled idol ruins.
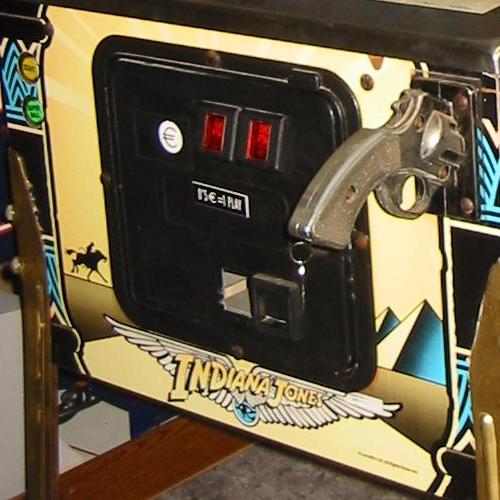
Chromed
Gun Handle
I bought a chromed gun that came up on Ebay. Click here for a picture of
the pre-cleanup state of the original gun. After tumbling,
the original cleaned up nice, but it still had rough surfaces right
where the palm rested.

The new gun handle. Shot without flash and long exposure time.

The unit is very shiny, and should last a long time
in a home environment.
Page 2 of Indiana Jones Pinball
Machine (more tech tips)
Links
- Other IJ enthusiasts' sites:
- IJ parts from various vendors:
- Pinball Universe.
- Pinball
Heaven
(
- Bay Area Amusements.
- Replacement WPC89 CPU board from Rottendog ($152 - no ASIC).
- Replacement Driver Board from Rottendog ($250).
- Replacement Driver Board from Pinball Medic ($225).
- Replacment Driver Board from Pinled ($299).
- Replacement Dot Matrix Driver board from Pinled ($89).
- Replacement Fliptronics II board from Pinled ($90).
- Right ramp without decal ($120).
- Lost Plastic
- Replacing the rear panel with a clear plastic (Kennedy).
- Scans of IJ plastics.
- Speaker
panel
mod (pinballark).
Log
- Jan 14 2006 - Purchased the machine from Randall Paris.
- Jan 18, 2006 - After three six-hour days, the machine has been stripped, cleaned, and waxed. All parts in the upper part of the playfield (except for the mini-playfield and the ramps) have been remounted.
- Jan 25, 2006 - Made and installed "Lost" plastic.
- Jan 27, 2006 - Repaired ball lock door.
- Jan 28, 2006 - Finished buffing last wire ramp with 1000 grit sandpaper and metal polish. This completes the shopping of the machine.
- Jan 28, 2006 - Purchased on ebay a pristine translite (item 7582664260: $46+6) to replace the one I already have as it has some scratches. This was the seller's note to me as to the origin of this rare item:
|
Hi Jim here, |
![]()
- Feb 4, 2006 - Installed lighting kit for Lost Plastic.
- Feb 6, 2006 - Installed propeller mod.
- Feb 9, 2006 - Shock mount for circuit boards on ball trough.
- Feb 17, 2006 - Replaced the ROMs with the latest rev from John Wart.
- Feb 25, 2006 - Protector plastics for the Jackpot and slingshot plastics.
- Feb 26,2006 - Repair of drop target plastic.
- March 11, 2006 - New targets.
- May 1, 2006 - Bought complete set of paper manuals for this machine on ebay for $26 + $12. Booklet, WPC schematics, manual and Williams envelope.

- June 4, 2006 - Repainted cab front.
- June 6, 2006 - Repainted head.
- June 19, 2006 - Repainted left side of head.
- July 8, 2006 - Added remote battery mod to the IJ.
- July 13, 2006 - Bought a pristine Lost Plastic from another RGP member for $35.
- August 10, 2006 - Found source of strange bug. Turns out to be switch matrix problem.
- October 8, 2006 - Added bass boost mod.
- October 18, 2006 - Write-up on mode start saucer mods.
- October 19, 2006 - Power amplifier for cabinet speaker.
- December 23, 2006 - New flipper rubber.
- May 23, 2007 - Bought a chromed gun on Ebay for ($100+15).
- December
22, 2007 - I found out why shots from the left flipper are so difficult
to hit the POA entrance: I had the incorrect coils on the machine. They are supposed to be
FL-11629, but I had FL-11630s on the machine.
More info on the coils here. I found an unused FL-15411
in my stock, and installed that one.
Results are noticeably better. The data
below from is from weakest to strongest. From here.
- FL-11753:
used for small flippers, like the "Thing" flipper on Addam's Family.
9.8 ohms/165 ohms. Usually a yellow coil wrapper.
- FL-11722:
used for weak flippers, like Twilight Zone's upper right flipper. 6.2
ohms/160 ohms. Usually a green coil wrapper.
- FL-11630:
"standard" flipper strength, as used on older games like Earthshaker,
Whirlwind, etc. 4.7 ohms/160 ohms. Usually a red coil wrapper.
- FL-15411
: strong flipper, as used for main flippers on Addam's Family, Twilight
Zone, etc. 4.2 ohms/145 ohms. Usually an orange coil wrapper.
- FL-11629: strongest Williams flipper. Used on most of the newest WPC games. 4.0 ohms/132 ohms. Usually a blue coil wrapper.
- October 25, 2020 - I received a nice letter from Gonzalo about this web page and how it helped him.
Previous Personal Album Page (Vacation in Aruba)
(c) 2006 Edward Cheung, all rights reserved.